Background
I was inspired by Stripe Atlas's site where they had built a globe which rotated to the specific country that a particular customer was located at.
Since I had no experience with 3d/three.js, I figured this was a neat idea to learn some fundamentals. The result turned out quite nice!
In this post I will go over how I was able to create this rotating globe using some three.js basics. If you have any questions, feel free to send me an email at timchang.tcc@gmail.com or DM me @timcchang.
Many thanks to Sam's help and original idea of converting 2d points into a 3d globe.
Overview
- Setting up #
- Drawing a mercator projection using dots #
- Convert dots into coordinates #
- Rendering the globe #
- Animating #
- Next steps #
Setting up
The first thing we will need to do is import the
three.js
libary alongside
OrbitControls.js, which allow us
to set the rotation animation later.
Let's set up the files. In index.html:
    <html>
      <head>Globe</head>
      <body>
        <div id="globe">
          <canvas></canvas>
        </div>

        <script src="./three.js"></script>
        <script src="./orbit-controls.js"></script>
        <script src="./globe.js"></script>
      </body>
    </html>
and in globe.js:
    (function() {
      console.log("👋")
    })()
Drawing a mercator projection using dots
We'll go into our favorite drawing tool and stencil a mercator projection using points.
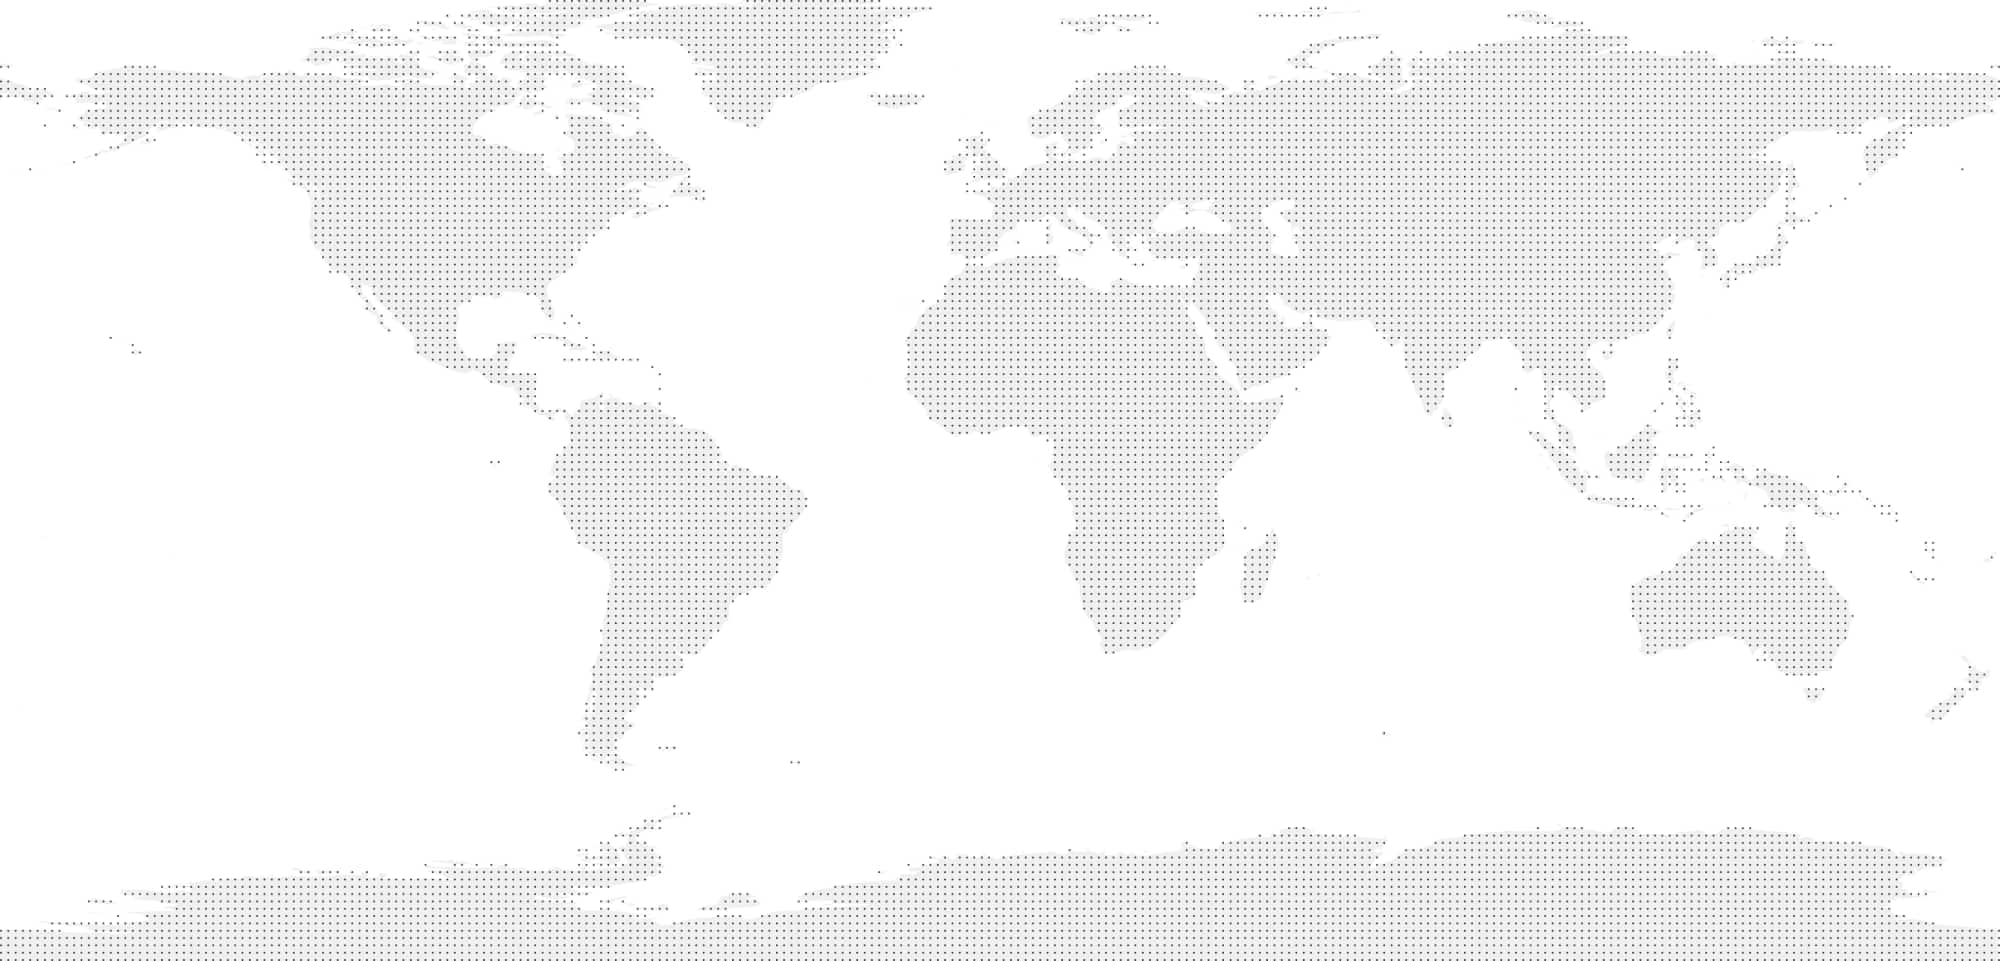
Convert dots into coordinates
The next step is to export the points into an svg, then converting the points
to
x and y coordinates.
Here is a script to do that for an svg that only has one level deep of layers. The resulting points are here. You can make this a lot faster by reducing the number of points.
Now that we have our points, we can go into the code and construct the globe.
A simple three.js setup consists of a scene which we can imagine as the container that all of our objects will be rendered in, a camera which is the item that controls how we look at our object, and a renderer, the abstraction that uses WebGL under the hood to display our object.
Here's how it looks. In globe.js:
    (function() {
      const container = document.getElementById("globe");
      const canvas = container.getElementsByTagName("canvas")[0];

      function init() {
        const { width, height } = container.getBoundingClientRect();

        // 1. Setup scene
        const scene = new THREE.Scene();
        // 2. Setup camera
        const camera = new THREE.PerspectiveCamera(45, width / height);
        // 3. Setup renderer
        const renderer = new THREE.WebGLRenderer({ canvas });
        renderer.setSize(width, height);

        // 4. Use requestAnimationFrame to recursively draw the scene in the DOM.
        function animate() {
          requestAnimationFrame(animate);
          renderer.render(scene, camera);
        }
        animate();
      }

      function hasWebGL() {
        const gl =
          canvas.getContext("webgl") || canvas.getContext("experimental-webgl");
        if (gl && gl instanceof WebGLRenderingContext) {
          return true;
        } else {
          return false;
        }
      }

      if (hasWebGL()) {
        init();
      }
    })()
We won't see anything yet, but we have set the foundation for our renderer to draw objects.
Rendering the globe
Okay, we now need to use the array of points to actually render something.
Let's update our code a bit to add the point data to our
init function.
    function init(points) {
      // ...
    }

    if (hasWebGL()) {
      window.fetch("../points.json")
      .then(response => response.json())
        .then(data => {
          init(data.points);
        });
    }
For each point, we are going to create a SphereGeometry with a
simple MeshBasicMaterial to make the color black.
    // ...
    // renderer.setSize(width, height);

    // Single geometry to contain all points.
    const mergedGeometry = new THREE.Geometry();
    // Material that the points will be made of.
    const pointGeometry = new THREE.SphereGeometry(0.5, 1, 1);
    const pointMaterial = new THREE.MeshBasicMaterial({
      color: "#000"
    });

    // function animate() {
    // ...
Next, we need to take the array of 2 dimensional points, loop through and convert each point into its 3 dimensional position. Here is a function to do the conversion. Depending on the size of the stenciled projection you created, you might need to tweak the first few variables.
    const globeRadius = 100;
    const globeWidth = 4098 / 2;
    const globeHeight = 1968 / 2;

    function convertFlatCoordsToSphereCoords(x, y) {
      let latitude = ((x - globeWidth) / globeWidth) * -180;
      let longitude = ((y - globeHeight) / globeHeight) * -90;
      latitude = (latitude * Math.PI) / 180;
      longitude = (longitude * Math.PI) / 180;
      const radius = Math.cos(longitude) * globeRadius;

      return {
        x: Math.cos(latitude) * radius,
        y: Math.sin(longitude) * globeRadius,
        z: Math.sin(latitude) * radius
      };
    }
and we loop through each point, converting their 2d coordinates to their respective 3d position:
    // ...
    // const pointMaterial = new THREE.MeshBasicMaterial({
    //   color: "#000"
    // });

    for (let point of points) {
      const { x, y, z } = convertFlatCoordsToSphereCoords(
        point.x,
        point.y,
        width,
        height
      );

      pointGeometry.translate(x, y, z);
      mergedGeometry.merge(pointGeometry);
      pointGeometry.translate(-x, -y, -z);
    }
The only way I was able to get the points to show up in the correct relative position is by first translating the points relative to the context outside of the mergedGeometry, then reversing the translation relative to the new context after merging. If you know of any other ways to do this please let me know!
Let's add the final geometry into the scene:
    const globeShape = new THREE.Mesh(mergedGeometry, pointMaterial);
    scene.add(globeShape);
Animating
In the above example, the globe is rotating and you are able to click and
interact with it. The simplest way to achieve this is by using the
OrbitControls library.
Add these orbit controls to the camera:
    // ...
    // scene.add(globeShape);

    camera.orbitControls = new THREE.OrbitControls(camera, canvas);
    camera.orbitControls.enablePan = true;
    camera.orbitControls.enableRotate = true;
    camera.orbitControls.autoRotate = true;
    // Tweak this value based on how far/away you'd like the camera
    // to be from the globe.
    camera.position.z = -265;

    // ...
    function animate() {
      // Since autoRotate is set to true, we need tool call update
      // on each animation frame.
      camera.orbitControls.update();
      // ...
    }
And there you have it!
We stenciled points using a mercator map, converted those points to 2
dimensional points, used three.js to render the globe by creating a
SphereMaterial, positioning it by the converted 2d to 3d
position, and used the OrbitControl library to animate and add
the ability to click and rotate the globe!
Next Steps
There are definitely optimizations that can happen here, though this is a good starting point to experiment with basic 3d fun using three.js. If you have gotten this far and are stuck on any part of your project, feel free to reach out to me! Sam (Flamov)'s help along with his open source code guided my through much of the complexities.